Prefix
BN
Built
1912
Closed
—
Type
North Eastern N4
Frame
McKenzie & Holland 16 (reconditioned) 1912; 60 levers (reduced)
Locking
Tappet
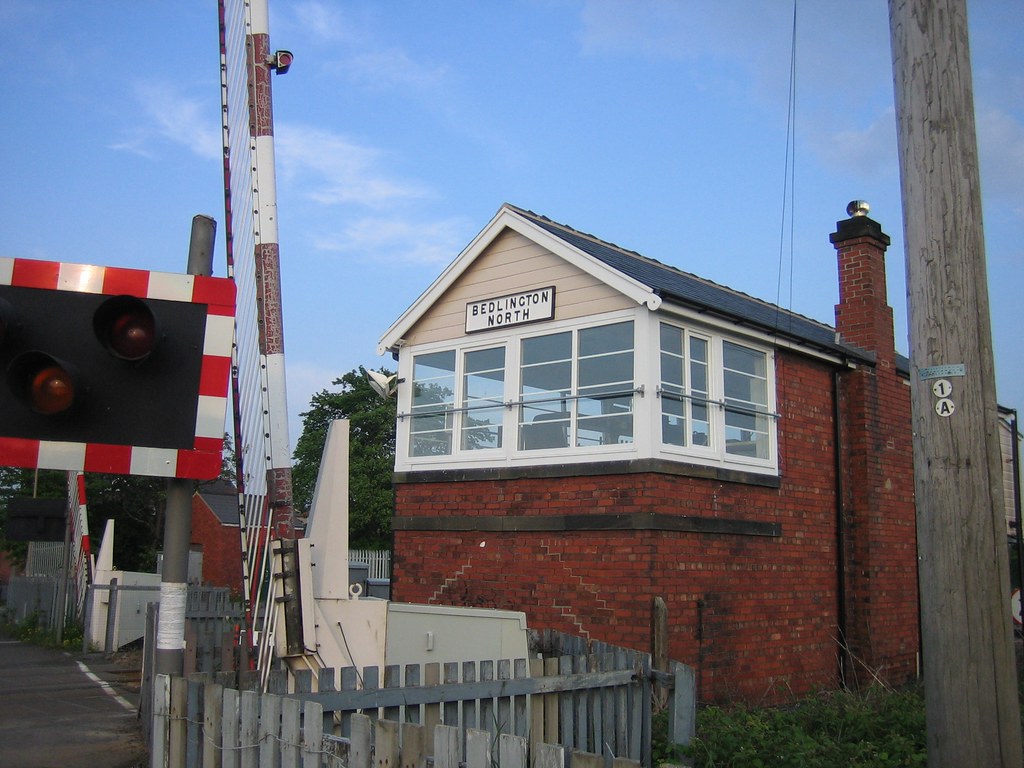
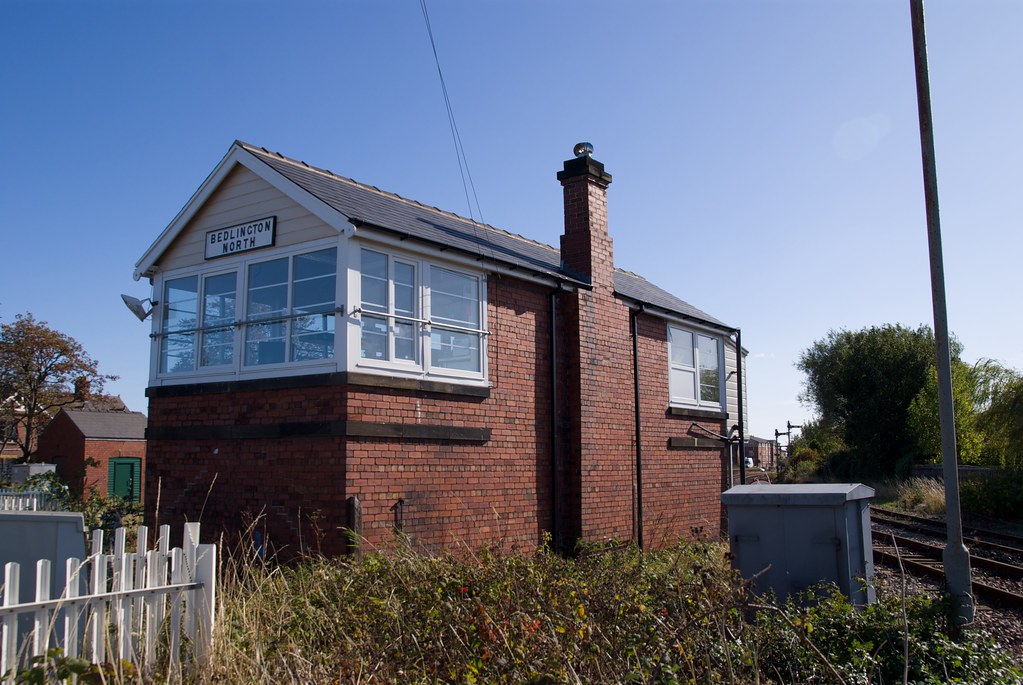
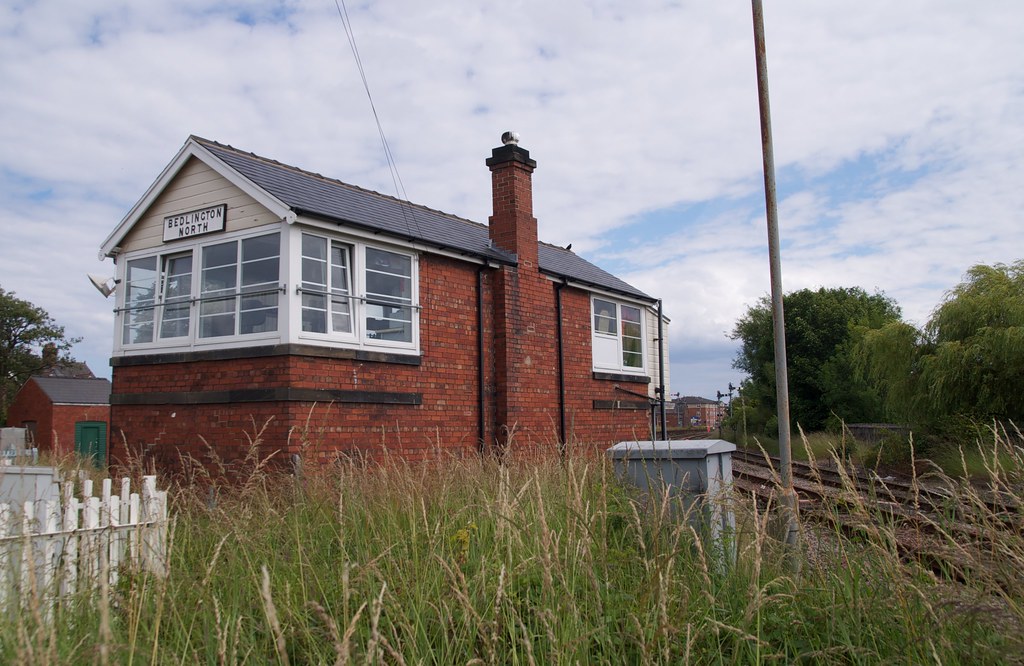
Bedlington North Signal Box is one of two signal boxes in Bedlington, and is situated at Bedlington North Junction. Currently, it controls the lines from Bedlington South to Morpeth and to Lynemouth, but previously it also controlled the northern end of Bedlington Station as well as a down side siding. It works to Bedlington South Signal Box, Morpeth PSB, Marcheys House Signal Box and Winning Signal Box (the latter two having taking over the functions of West Sleekburn Signal Box when it was closed.)
Images

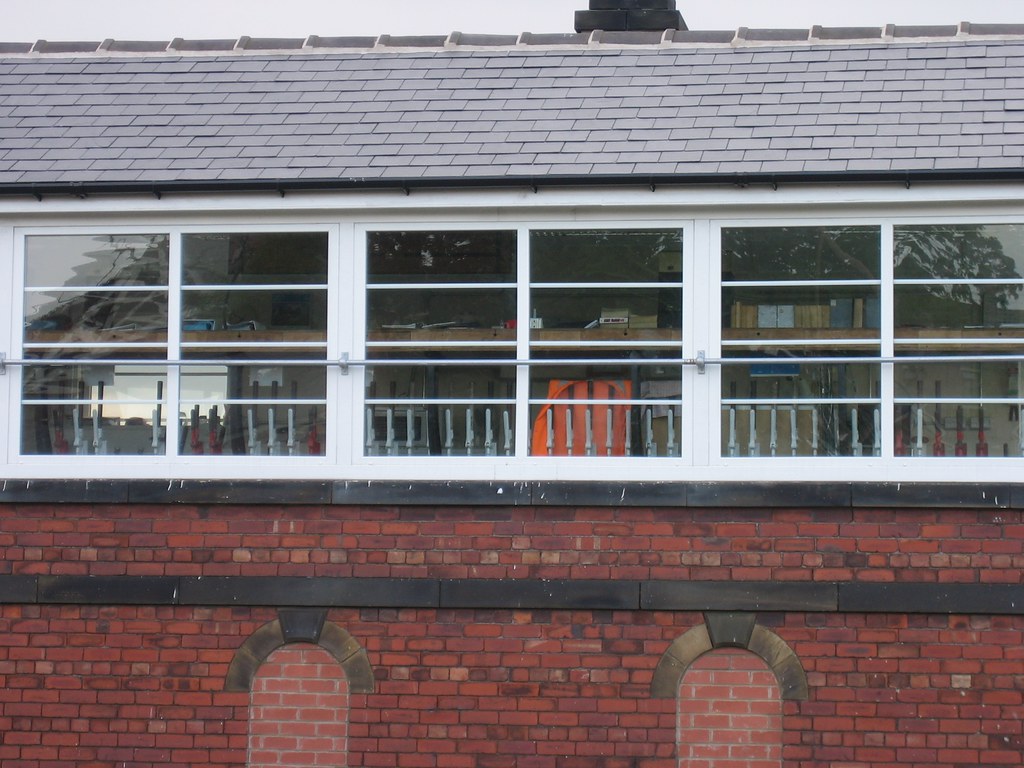
Lever Frame Details
| Lever | Function | Description | |
|---|---|---|---|
| 1 - 4 | Spare | — | |
| 5 | Release | Release to Branch Barriers | — |
| 6 | Spare | — | |
| 7 | Points with FPL | Up Winning | Up Bch. | — |
| 8 | Stop | Up Winning Home 7. | — |
| 9 | Stop | Up Bch. Home | — |
| 10 | Stop | Up Branch Starting 48. | — |
| 11 | Spare | — | |
| 12 | Stop | Up Main Home | — |
| 13 - 39 | Spare | — | |
| 40 | Points with FPL | Mains | X’ Over | — |
| 41 | Stop | Direction Lever | — |
| 42 - 45 | Spare | — | |
| 46 | Stop (Electric Release) | Dn. Bch. Starting NIL or to Dn. Winning 45. | — |
| 47 | Stop | Dn. Bch. Home 2. | — |
| 48 | Points | Up Main | Up Branch | — |
| 49 | Spare | — | |
| 50 | Points | Dn. Main | Dn. Branch 48. | — |
| 51 | FPL | F.P. Lock to 50. Points | — |
| 52 - 53 | Spare | — | |
| 54 | Stop | Dn. Main to Dn. Branch 48. 50. 51. | — |
| 55 | Spare | — | |
| 56 - 58 | Removed | — | |
| 59 | Spare | — | |
| 60 | Stop | Dn. Main Starting 40. | — |
| 61 - 62 | Spare | — | |
| 63 | Stop | Dn. Main Home 51. | — |
| 64 | Spare | — |
| Lever | Function | Description | |
|---|---|---|---|
| 1 - 4 | Spare | — | |
| 5 | Release | Release to Branch Barriers | — |
| 6 | Release | Release to Main Line Barriers | — |
| 7 | Spare | — | |
| 8 | Stop | Up Branch – Home | — |
| 9 | Spare | — | |
| 10 | Stop | Up Branch Starting | — |
| 11 | Stop | Up Branch – Calling On | — |
| 12 | Stop | Up Main – Home | — |
| 13 | Stop | Up Main – Calling On | — |
| 14 - 18 | Spare | — | |
| 19 | Stop | Down Branch – Advanced Starting | — |
| 20 | Stop | Shunting – Down Branch to Up Branch | — |
| 21 | Spare | — | |
| 22 | Points | Branch Crossover | — |
| 23 | Spare | — | |
| 24 | Stop | Backing – Up to Down Branch | — |
| 25 - 37 | Spare | — | |
| 38 | Stop | Shunting – Down Main to Up Main | — |
| 39 | Spare | — | |
| 40 | Points | Mains Crossover | — |
| 41 | Bar | Locking Bar to No. 40 Points | — |
| 42 | Stop | Backing – Down Main to Down Sdg | — |
| 43 | Points | Down Main | Down Siding | — |
| 44 | Stop | From Down Siding | — |
| 45 - 47 | Spare | — | |
| 48 | Points | From Branch | — |
| 49 | Bar | Locking Bar to No. 48 Points | — |
| 50 | Points | To Branch | — |
| 51 | Bar | Locking Bar to No. 50 Points | — |
| 52 | Stop | Down Branch – Starting | — |
| 53 | Stop | From Up Platform to Branch | — |
| 54 | Stop | Down Branch – Home | — |
| 55 | Spare | — | |
| 56 - 58 | Removed | — | |
| 59 | Spare | — | |
| 60 | Stop | Down Main Starting | — |
| 61 | Stop | Up Platform to Down Main | — |
| 62 | Release | Release to South for Up Main – Down Direction | — |
| 63 | Stop | Down Main – Home | — |
| 64 | Release | Release from South for Shunting Down Main | — |